Winter is here, and there's no better way to embrace the season than with a stunning snowflake nail design. As the snowflakes fall gently from the sky, your nails can mimic their delicate beauty with intricate patterns and icy hues. Whether you're a nail art enthusiast or simply looking for a seasonal manicure, snowflake nail designs offer endless possibilities to express your creativity and style.
From classic white snowflakes to bold pops of color, these nail designs are perfect for capturing the magic of winter. They are not only a trend but also an opportunity to showcase your individuality while staying in sync with the season. Whether you're attending a holiday party or simply want to elevate your everyday look, snowflake nail designs are sure to turn heads.
In this comprehensive guide, we'll explore everything you need to know about snowflake nail designs. From basic techniques to advanced tips, we'll cover all aspects to help you achieve the perfect winter-inspired look. Let's dive into the world of snowflake nails and discover how to make your manicure as enchanting as a snow-covered landscape.
Read also:Did Luke Combs Brother Really Die A Deep Dive Into The Truth Behind The Rumors
Table of Contents
- Biography
- History of Snowflake Nail Design
- Tools and Materials Needed
- Basic Snowflake Nail Designs
- Advanced Snowflake Nail Designs
- Choosing the Right Colors
- How to Apply Snowflake Nail Designs
- Maintaining Your Snowflake Nails
- Current Trends in Snowflake Nail Designs
- Tips for Beginners
Biography
While snowflake nail designs are not attributed to a single creator, the art of nail decoration has a rich history. Nail art has evolved over the years, with each era bringing its own unique trends and techniques. Today, snowflake nail designs are a popular choice among nail artists and enthusiasts alike.
| Creator | Year Established | Location | Specialty |
|---|---|---|---|
| Various Artists | 1980s-Present | Global | Winter-Themed Nail Art |
History of Snowflake Nail Design
Snowflake nail designs have their roots in the broader history of nail art, which dates back thousands of years. Ancient Egyptians were among the first to adorn their nails with henna, using it as a symbol of social status. Over time, nail art evolved to include various designs and techniques, eventually leading to the intricate patterns we see today.
In the 1980s, acrylic nails became popular, paving the way for more elaborate designs. Snowflake nail designs gained popularity in the early 2000s as people sought ways to incorporate winter themes into their beauty routines. Today, advancements in nail art technology have made it easier than ever to create stunning snowflake designs.
Tools and Materials Needed
Creating snowflake nail designs requires a few essential tools and materials. Here's a list to get you started:
- Nail polish in various shades (white, blue, silver, etc.)
- Fine detail brushes or dotting tools
- Stencils for precise designs
- Topcoat for a glossy finish
- Base coat to protect your nails
Having the right tools will make the process smoother and help you achieve professional-looking results.
Basic Snowflake Nail Designs
Simple White Snowflakes
For beginners, starting with simple white snowflakes is a great way to practice your skills. Use a fine detail brush to create delicate lines radiating from a central point on your nail. This design is timeless and can be paired with any nail color.
Read also:Understanding Connor Mcgregors Height A Comprehensive Look
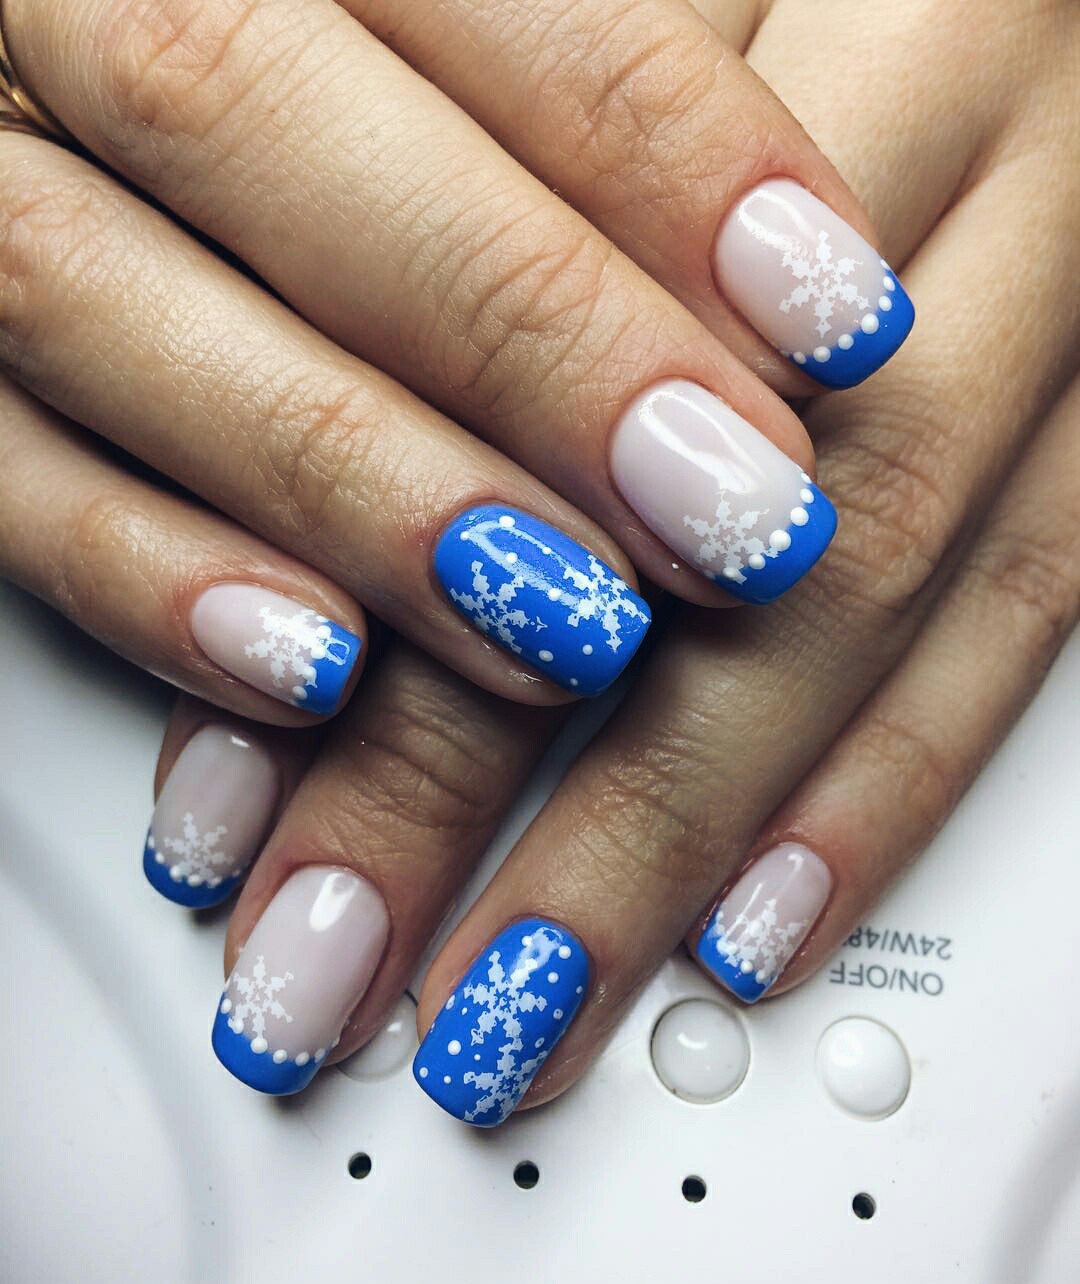
Blue and Silver Snowflakes
Adding a pop of color can elevate your snowflake design. Combine blue and silver nail polish to create a frosty effect. Use a dotting tool to add small dots around the snowflake for an extra touch of sparkle.
Advanced Snowflake Nail Designs
3D Snowflakes
For a more advanced look, try creating 3D snowflakes using nail art gels or acrylics. This technique adds depth and texture to your design, making it stand out even more. It's a great option for special occasions or when you want to make a bold statement.
Gel Nail Snowflakes
Gel nails provide a long-lasting finish and are perfect for intricate designs like snowflakes. Use a gel polish and a fine brush to create detailed patterns. The glossy finish of gel nails enhances the beauty of the snowflake design.
Choosing the Right Colors
When it comes to snowflake nail designs, color choices are endless. Traditional winter colors like white, blue, and silver are popular, but don't be afraid to experiment with other shades. Here are some suggestions:
- Pastel blues for a soft, dreamy look
- Deep purples for a regal touch
- Gold accents for a luxurious feel
Selecting the right colors can enhance the overall aesthetic of your snowflake nail design.
How to Apply Snowflake Nail Designs
Applying snowflake nail designs requires patience and precision. Follow these steps for a flawless application:
- Start with a clean, polished base coat.
- Choose your nail polish colors and arrange your tools.
- Paint the base color on your nails and let it dry completely.
- Use a fine detail brush to draw the snowflake design, starting with the center point.
- Add finishing touches, such as dots or glitter, for extra sparkle.
- Finish with a topcoat to seal the design and add shine.
With practice, you'll be able to create beautiful snowflake designs with ease.
Maintaining Your Snowflake Nails
To ensure your snowflake nail design lasts as long as possible, proper maintenance is key. Here are some tips:
- Avoid using harsh chemicals that can damage the polish.
- Apply a topcoat every few days to maintain shine and protect the design.
- Keep your nails clean and moisturized to prevent chipping.
With these simple steps, your snowflake nails will stay looking fresh and beautiful throughout the season.
Current Trends in Snowflake Nail Designs
Snowflake nail designs continue to evolve, with new trends emerging each year. Some of the latest trends include:
- Ombre effects to create a gradient look
- Matte finishes for a more understated appearance
- Incorporating glitter for added sparkle
Staying updated with the latest trends will help you keep your snowflake nail designs fresh and exciting.
Tips for Beginners
If you're new to snowflake nail designs, here are some tips to help you get started:
- Practice on a piece of paper before applying the design to your nails.
- Start with simple designs and gradually work your way up to more complex patterns.
- Invest in quality tools and materials for better results.
Remember, practice makes perfect, and with time, you'll be able to create stunning snowflake nail designs with confidence.
Conclusion
Snowflake nail designs offer a magical way to embrace the winter season and express your creativity. From simple white snowflakes to intricate 3D designs, there's something for everyone to enjoy. By following the tips and techniques outlined in this guide, you can achieve professional-looking results and make your nails the envy of all who see them.
We invite you to share your thoughts and experiences in the comments below. If you enjoyed this article, don't forget to share it with your friends and explore other nail art ideas on our website. Let's make this winter a dazzling one with stunning snowflake nail designs!